
Custom Storage Locations
Synapse provides physical storage for files using Amazon S3, however, you can configure your own custom storage locations as well. For example, data files can physically reside in your own S3 bucket, Google Cloud Storage Bucket, or a local file server using a proxy servers. Creating a custom storage location allows you greater ownership and control of your files, especially when you have a large amount of data or when additional restrictions need to be set on the data.
Note: System metadata, annotations, and provenance records are still stored in Synapse's S3 storage.
Setting Up an External AWS S3 Bucket
This article will describe two ways to setup an external AWS S3 bucket:
Setup with AWS Console: Manual setup using the AWS Console.
Setup with AWS Cloudformation: Automated setup using AWS Cloudformation.
To begin, follow the documentation on Amazon Web Service (AWS) site to Create a Bucket. Buckets do not need to be located in the US.
Make the following adjustments to customize the bucket to work with Synapse:
When the AWS instructions prompt you to
Create a Bucket - Select a Bucket Name and Region, use a unique name. For example,thisisthenameofmybucket.Select the newly created bucket and click the Permissions tab.
Select the Bucket Policy button and copy one of the below policies (read-only or read-write permissions). Change the name of
Resourcefrom “synapse-share.yourcompany.com” to the name of your new bucket (twice) and ensure that thePrincipalis"AWS":"325565585839". This is Synapse’s account number.
Note: Files in an external bucket will not be automatically added to Synapse.
To add files to Synapse that are already in your bucket, see below.
Read-Write Permissions
To allow authorized Synapse users to upload data to your bucket, read-write permissions need to be set on that bucket so you can allow Synapse to upload and retrieve files:
{
    "Statement": [
        {
            "Action": [ "s3:ListBucket", "s3:GetBucketLocation" ],
            "Effect": "Allow",
            "Resource": "arn:aws:s3:::thisisthenameofmybucket",
            "Principal": { "AWS": "325565585839" }
        },
        {
            "Action": [ "s3:GetObject", "s3:PutObject", "s3:DeleteObject", "s3:AbortMultipartUpload" ],
            "Effect": "Allow",
            "Resource": "arn:aws:s3:::thisisthenameofmybucket/*",
            "Principal": { "AWS": "325565585839" }
        }
    ]
}
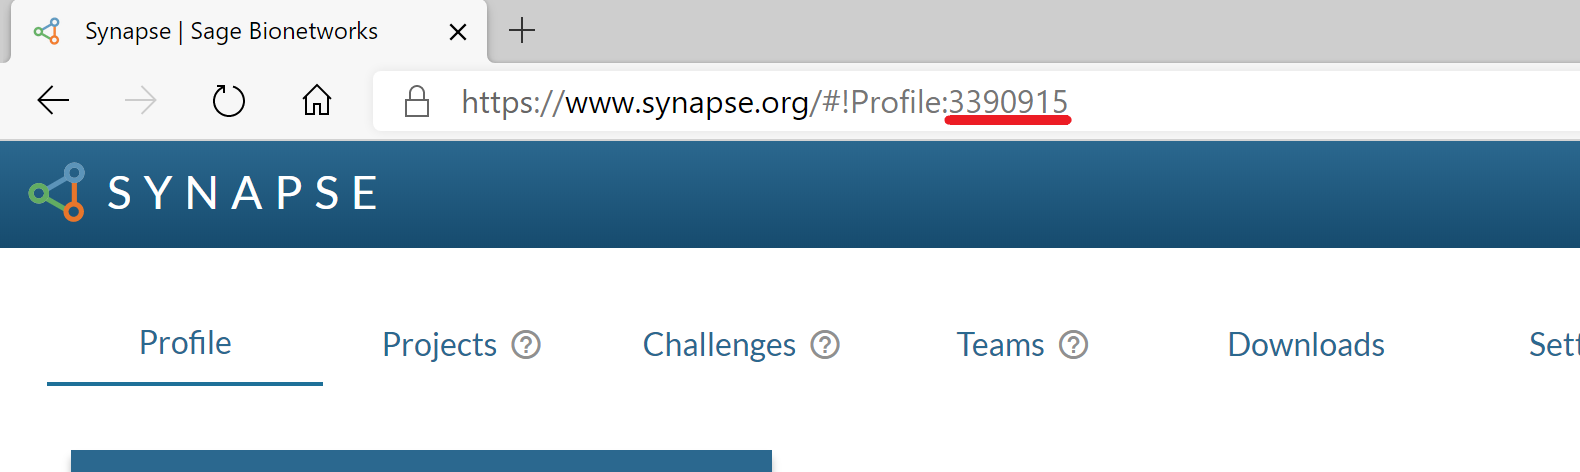
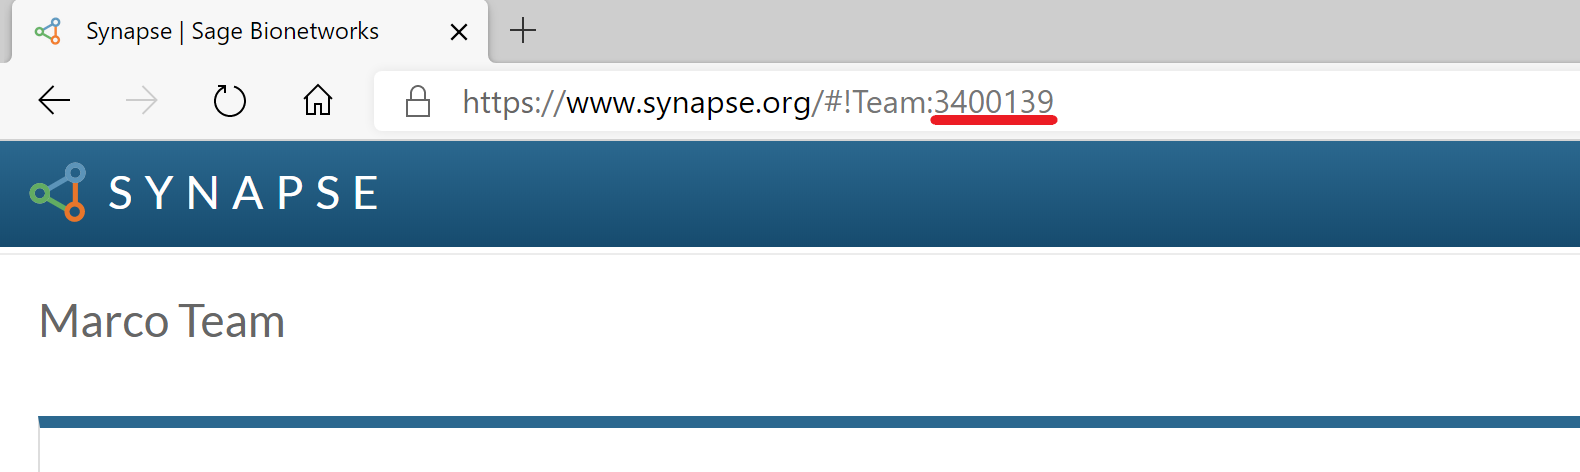
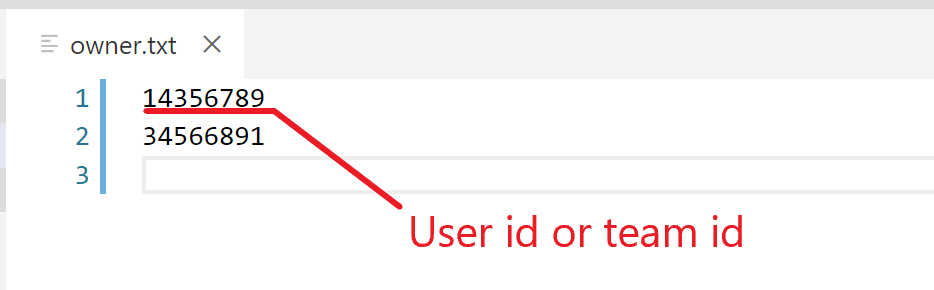
To register the bucket with Synapse, you also need to create an object that proves to the Synapse service that you own this bucket. This can be done by creating a file named owner.txt that contains a line or comma separated list of user identifiers that are allowed to register and upload to the bucket. Valid user identifiers are a numeric Synapse user ID or the numeric ID of a team that you are a member of.
The ID of the user or the team can be obtained by navigating to the user profile or to the team page. The ID is the numeric value shown in the browser URL bar after the Profile: or Team: prefixes.
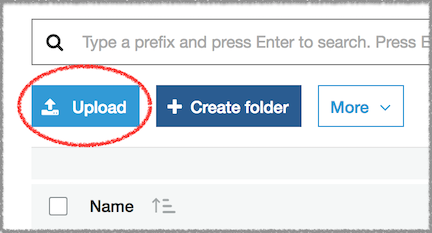
You can upload the file with the Amazon Web Console or the AWS command line client.
Web
Navigate to your bucket on the Amazon Console and select Upload to upload your text file.
Command line
# copy your owner.txt file to your s3 bucket
aws s3 cp owner.txt s3://nameofmybucket/nameofmyfolder
Read-Only Permissions
If you do not want to allow authorized Synapse users to upload data to your bucket but provide read access instead, you can change the permissions to read-only:
{
    "Statement": [
        {
            "Action": [ "s3:ListBucket", "s3:GetBucketLocation" ],
            "Effect": "Allow",
            "Resource": "arn:aws:s3:::synapse-share.yourcompany.com",
            "Principal": { "AWS": "325565585839" }
        },
        {
            "Action": [ "s3:GetObject" ],
            "Effect": "Allow",
            "Resource": "arn:aws:s3:::synapse-share.yourcompany.com/*",
            "Principal": { "AWS": "325565585839" }
        }
    ]
}
Enable Cross-Origin Resource Sharing (CORS)
In Permissions, click CORS configuration. In the CORS configuration editor, edit the configuration so that Synapse is included in the AllowedOrigin tag. An example CORS configuration that would allow this is:
<CORSConfiguration>
    <CORSRule>
        <AllowedOrigin>*</AllowedOrigin>
        <AllowedMethod>GET</AllowedMethod>
        <AllowedMethod>POST</AllowedMethod>
        <AllowedMethod>PUT</AllowedMethod>
        <AllowedMethod>HEAD</AllowedMethod>
        <MaxAgeSeconds>3000</MaxAgeSeconds>
        <AllowedHeader>*</AllowedHeader>
    </CORSRule>
</CORSConfiguration>
For more information, please read: How Do I Configure CORS on My Bucket?
Setup with AWS Cloudformation
For convienance, AWS Cloudformation can be used to provision a custom AWS S3 bucket for use with Synapse. Using this approach will result in the exact same bucket as described in Setup with AWS Console.
Instructions:
Download the CF template.
Use the AWS Command Line or AWS Console to execute the template which will automatically provision the bucket.
Example using the the awscli:
aws cloudformation create-stack \
--stack-name MyCustomSynapseBucket \
--template-body file://SynapseExternalBucket.yaml \
--parameters ParameterKey=Department,ParameterValue=Cancer ParameterKey=Project,ParameterValue=Mammography \
ParameterKey=OwnerEmail,ParameterValue=joe.smith@company.com ParameterKey=SynapseUserName,ParameterValue=jsmith
The above example shows required parameters:
Department - A department tag. Can be any arbitrary text.
Project - A project tag. Can be any arbitrary text.
OwnerEmail - A bucket owner tag. A valid email.
SynapseUserName - The Synapse account user name. Note: Department, Project, OwnerEmail are only used to tag the bucket and can be arbitrary.
The following are optional parameters:
# (Optional) true for read-write, false (default) for read-only bucket
AllowWriteBucket: 'true'
# (Optional) true (default) to encrypt bucket, false for no encryption
EncryptBucket: 'false'
# (Optional) 'Enabled' to enable bucket versioning, default is 'Suspended'
BucketVersioning: 'Enabled'
# (Optional) 'Enabled' to enable bucket data life cycle rule, default is 'Disabled'
EnableDataLifeCycle: 'Enabled'
# (Optional) S3 bucket objects will transition into this storage class: GLACIER(default), STANDARD_IA, ONEZONE_IA
LifecycleDataStorageClass: 'STANDARD_IA'
# (Optional) Number of days until S3 objects are moved to the LifecycleDataStorageClass, default is 30
LifecycleDataTransition: '90'
# (Optional) Number of days (from creation) when objects are deleted from S3 and LifecycleDataStorageClass, default is 365000
LifecycleDataExpiration: '1825'
# (Optional) Restrict downloading files from this bucket to only AWS resources (e.g. EC2 , Lambda) within the same region as this bucket. default is false.
SameRegionResourceAccessToBucket: 'true'
After executing the Cloudformation command, view the AWS Cloudformation dashboard to verify whether the bucket was provisioned successfully.
Set S3 Bucket as Upload Location
By default, your project/folder uses Synapse’s default S3 storage location. You can use the external bucket configured above via the web or programmatic clients.
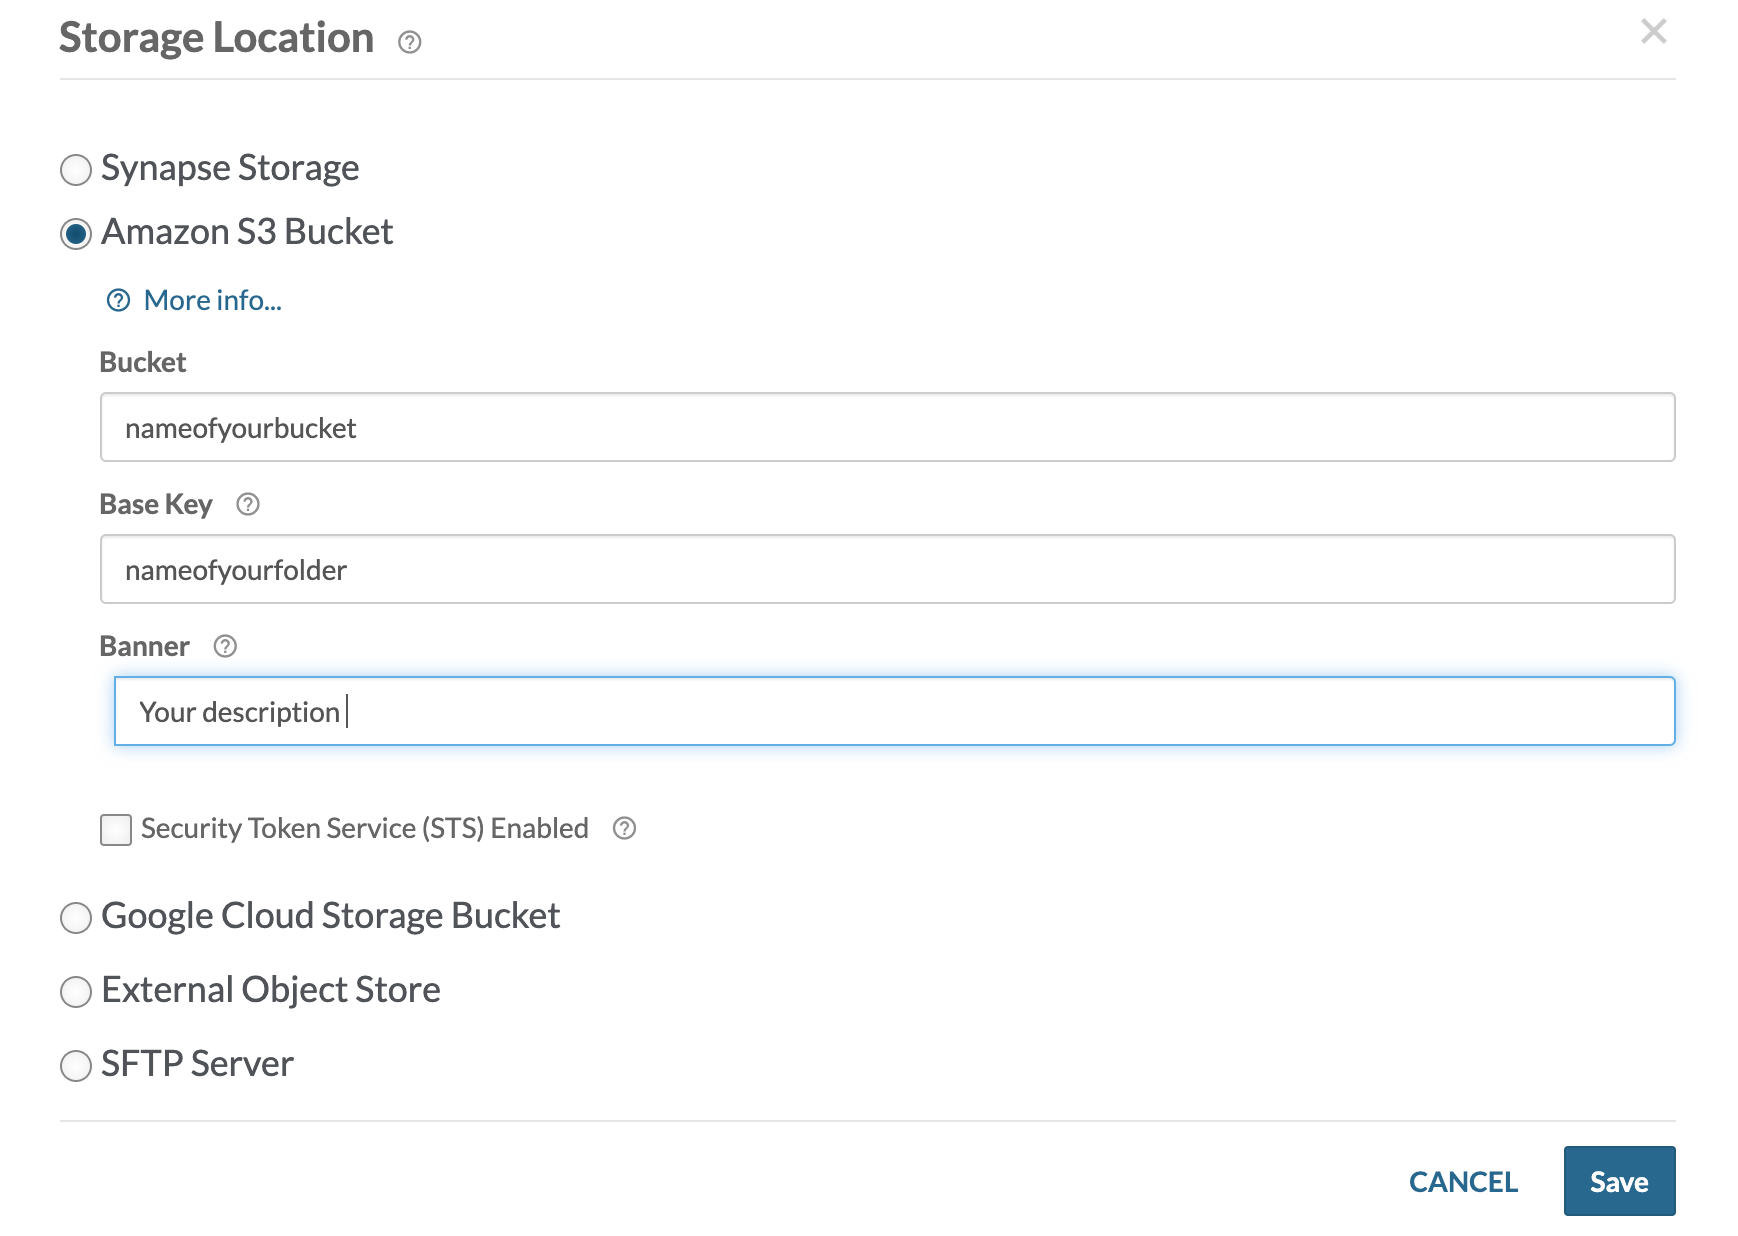
Web
Navigate to your project or folder of interest, then select Tools, and Change Storage Location. In the resulting pop-up, select the Amazon S3 Bucket option and fill in the relevant information, where Bucket is the name of your external bucket, the optional Base Key is the name of the folder in your bucket to upload to, and Banner is a short description such as who owns the storage location:
Python
# Set storage location
import synapseclient
import json
syn = synapseclient.login()
PROJECT = 'syn12345'

destination = {'uploadType':'S3',
               'concreteType':'org.sagebionetworks.repo.model.project.ExternalS3StorageLocationSetting',
               'bucket':'nameofyourbucket'}
destination = syn.restPOST('/storageLocation', body=json.dumps(destination))

project_destination ={'concreteType': 'org.sagebionetworks.repo.model.project.UploadDestinationListSetting',
                      'settingsType': 'upload'}
project_destination['locations'] = [destination['storageLocationId']]
project_destination['projectId'] = PROJECT

project_destination = syn.restPOST('/projectSettings', body = json.dumps(project_destination))
R
#set storage location
library(synapser)
library(rjson)
synLogin()
projectId <- 'syn12345'

destination <- list(uploadType='S3',
                    concreteType='org.sagebionetworks.repo.model.project.ExternalS3StorageLocationSetting',
                    bucket='nameofyourbucket')
destination <- synRestPOST('/storageLocation', body=toJSON(destination))

projectDestination <- list(concreteType='org.sagebionetworks.repo.model.project.UploadDestinationListSetting',
                           settingsType='upload')
projectDestination$locations <- list(destination$storageLocationId)
projectDestination$projectId <- projectId

projectDestination <- synRestPOST('/projectSettings', body=toJSON(projectDestination))
Adding Files in your S3 Bucket to Synapse
If your bucket is set for read-write access, files can be added to the bucket using the standard Synapse interface (web or programmatic).
If the bucket is read-only or you already have content in the bucket, you will have to add representations of the files in Synapse programmatically. This is done using a FileHandle, which is a Synapse representation of the file.
Python
# create filehandle
fileHandle = {'concreteType': 'org.sagebionetworks.repo.model.file.S3FileHandle',
              'fileName'    : 'nameOfFile.csv',
              'contentSize' : "sizeInBytes",
              'contentType' : 'text/csv',
              'contentMd5' :  'md5',
              'bucketName' : destination['bucket'],
              'key' : 's3ObjectKey',
              'storageLocationId': destination['storageLocationId']}
fileHandle = syn.restPOST('/externalFileHandle/s3', json.dumps(fileHandle), endpoint=syn.fileHandleEndpoint)

f = synapseclient.File(parentId=PROJECT, dataFileHandleId = fileHandle['id'])

f = syn.store(f)
R
# create filehandle
fileHandle <- list(concreteType='org.sagebionetworks.repo.model.file.S3FileHandle',
                   fileName    = 'nameOfFile.csv',
                   contentSize = 'sizeInBytes',
                   contentType = 'text/csv',
                   contentMd5 =  'md5',
                   storageLocationId = destination$storageLocationId,
                   bucketName = destination$bucket,
                   key ='s3ObjectKey')
fileHandle <- synRestPOST('/externalFileHandle/s3', body=toJSON(fileHandle), endpoint = 'https://file-prod.prod.sagebase.org/file/v1')

f <- File(dataFileHandleId=fileHandle$id, parentId=projectId)

f <- synStore(f)
See the REST docs for more information on setting external storage location settings using our REST API.
Setting up an External Google Cloud Storage Bucket
Follow the documentation on Google Cloud’s site to Create a Bucket.
Make the following adjustments to customize it to work with Synapse:
Select the newly created bucket and click the Permissions tab.
Select the Add members button and enter the member
synapse-svc-prod@uplifted-crow-246820.iam.gserviceaccount.com. This is Synapse’s service account. Give the account the permissions Storage Legacy Bucket Reader and Storage Object Viewer for read permission. To allow Synapse to upload files, additionally grant the Storage Legacy Bucket Writer permission.
To register the bucket with Synapse, you also need to create an object that proves to the Synapse service that you own this bucket. This can be done by creating a file named owner.txt that contains a line or comma separated list of user identifiers that are allowed to register the bucket and uploading it to your bucket. Valid user identifiers are: a Synapse user ID or the ID of a team that you are a member of.
The ID of the user or the team can be obtained by navigating to the user profile or to the team page, the ID is the numeric value shown in the browser URL bar after the Profile: or Team: prefixes:
You can upload the file with the Google Cloud Platform Console, or using the command line gsutil application.
Note: Files in an external bucket will not be automatically added to Synapse.
To add files to Synapse that are already in your bucket, see below.
Command line
# copy your owner.txt file to your s3 bucket
gsutil cp owner.txt gs://nameofmybucket/nameofmyfolder
Web
Navigate to your bucket on the Google Cloud Console and select the Upload files button to upload your text file into the folder where you want your data.
Enable Cross-Origin Resource Sharing (CORS)
Follow the instructions for Setting CORS on a bucket. You may have to install the gsutil application.
The configuration must include Synapse as a permitted origin. An example CORS configuration that would allow this is:
[
    {
        "maxAgeSeconds": 3000,
        "method": ["GET", "POST", "PUT", "HEAD"],
        "origin": ["*"],
        "responseHeader": ["Content-Type"]
    }
]
Using gsutil, you can set the CORS configuration with the command:
gsutil cors set cors-json-file.json gs://example-bucket
where cors-json-file.json is a local file that contains a valid CORS configuration.
For more information, please read: Configuring cross-origin resource sharing (CORS).
Set Google Cloud Bucket as Upload Location
By default, your project uses the Synapse default storage location. You can use the external bucket configured above via our programmatic clients or web client.
Python
# Set storage location
import synapseclient
import json
syn = synapseclient.login()
PROJECT = 'syn12345'

destination = {'uploadType':'GOOGLECLOUDSTORAGE',
               'concreteType':'org.sagebionetworks.repo.model.project.ExternalGoogleCloudStorageLocationSetting',
               'bucket':'nameofyourbucket',
               'baseKey': 'nameOfSubfolderInBucket' # optional, only necessary if using a subfolder in your bucket
               }
destination = syn.restPOST('/storageLocation', body=json.dumps(destination))

project_destination ={'concreteType': 'org.sagebionetworks.repo.model.project.UploadDestinationListSetting',
                      'settingsType': 'upload'}
project_destination['locations'] = [destination['storageLocationId']]
project_destination['projectId'] = PROJECT

project_destination = syn.restPOST('/projectSettings', body = json.dumps(project_destination))
R
#set storage location
library(synapser)
library(rjson)
synLogin()
projectId <- 'syn12345'

destination <- list(uploadType='GOOGLECLOUDSTORAGE',
                    concreteType='org.sagebionetworks.repo.model.project.ExternalGoogleCloudStorageLocationSetting',
                    bucket='nameofyourbucket',
                    baseKey='nameOfSubfolderInBucket' # optional, only necessary if using a subfolder in your bucket
               }
)
destination <- synRestPOST('/storageLocation', body=toJSON(destination))

projectDestination <- list(concreteType='org.sagebionetworks.repo.model.project.UploadDestinationListSetting',
                           settingsType='upload')
projectDestination$locations <- list(destination$storageLocationId)
projectDestination$projectId <- projectId

projectDestination <- synRestPOST('/projectSettings', body=toJSON(projectDestination))
Web
Navigate to your project or folder of interest, then select Tools, and Change Storage Location. In the resulting pop-up, select the Google Cloud Storage Bucket option and fill in the relevant information, where Bucket is the name of your external bucket, Base Key is the name of the folder in your bucket to upload to, and Banner is a short description such as who owns the storage location.
Adding Files in Your Google Cloud Bucket to Synapse
If your bucket is set for read-write access, files can be added to the bucket using the standard Synapse interface (web or programmatic).
If the bucket is read-only or you already have content in the bucket, you will have to add representations of the files in Synapse programmatically. This is done using a FileHandle, which is a Synapse representation of the file.
Python
externalFileToAdd = 'googleCloudObjectKey' # put the key for the file to add here

# create filehandle
fileHandle = {'concreteType': 'org.sagebionetworks.repo.model.file.GoogleCloudFileHandle',
              'fileName'    : 'nameOfFile.csv',
              'contentSize' : "sizeInBytes",
              'contentType' : 'text/csv',
              'contentMd5' :  'md5',
              'bucketName' : destination['bucket'],
              'key' : externalFileToAdd,
              'storageLocationId': destination['storageLocationId']}
fileHandle = syn.restPOST('/externalFileHandle/googleCloud', json.dumps(fileHandle), endpoint=syn.fileHandleEndpoint)
f = synapseclient.File(parentId=PROJECT, dataFileHandleId = fileHandle['id'])
f = syn.store(f)
R
externalFileToAdd <- 'googleCloudObjectKey' # put the key for the file to add here

# create filehandle
fileHandle <- list(concreteType='org.sagebionetworks.repo.model.file.GoogleCloudFileHandle',
                   fileName    = 'nameOfFile.csv',
                   contentSize = 'sizeInBytes',
                   contentType = 'text/csv',
                   contentMd5 =  'md5',
                   storageLocationId = destination$storageLocationId,
                   bucketName = destination$bucket,
                   key = externalFileToAdd)
fileHandle <- synRestPOST('/externalFileHandle/googleCloud', body=toJSON(fileHandle), endpoint = 'https://file-prod.prod.sagebase.org/file/v1')
f <- File(dataFileHandleId=fileHandle$id, parentId=projectId)
f <- synStore(f)
Please see the REST docs for more information on setting external storage location settings using our REST API.
See also: